Hello! I hope you all had a wonderful Thanksgiving! Ours was filled with the slow and steady completion of projects around the house and some fun with our boys, all while eating our fill of turkey and all of the fixings. Throw in some Christmas decorating inside and out and it was a flurry of activity, I tell you! I wish I could say that I had pictures to share from our weekend, but Jason only managed to snap a few with our camera while I took a few more with my phone. It is funny. I used to be attached to that camera and felt like the boys rarely saw me without that thing. Now, I use my phone to take pictures. I've gotten lazy! I need to find a happy medium. I'll be working on that in the next few weeks.
Today, I have a delightfully easy and whimsical project to share with you! Last year, I purchased the sweetest glass mushroom ornaments from Crate and Barrel. How fun, I thought, it would be to make these myself! And so I did!
Here is what you will need to make your own clay mushroom ornament:
Clay, I used Original Sculpey Clay in white (the oven-bake kind)
A wooden skewer
Glitter glue
Glitter
String or twine
To begin, you will need to gather two pieces of clay roughly the same size and form one into a long tube-like shape and the other into a flat, round disk, similar to this:
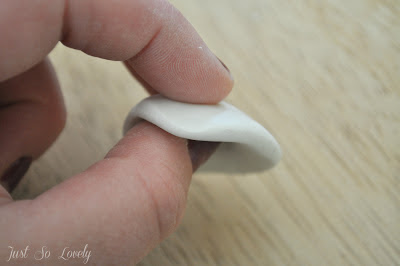
Take the flat disk shape and press your thumb into it, so that it forms a cup-like shape. Then, take the tube-like shape and flatten one end of it so that it can stand up.
Your pieces should look like this when you are done.
Carefully push the two pieces together to form your mushroom. To make the hole at the top, use a wooden skewer.
The hole should look like this after you remove the skewer. You are now ready to bake your mushroom. To do this, follow the directions on your clay packaging.
To decorate your mushroom, simply brush with glitter glue and sprinkle with glitter.
After the glue has dried, you are ready to hang your mushroom.
Thank you for reading! Have a wonderful day!
I'm linking up to:


