Monday, November 28, 2011

Crown of Thorns Tree Topper

Jason and I never really had something to place on top of our Christmas tree.  We bought a glittery gold star at a department store our first year of marriage because we had a coupon and needed to find something to buy!  Truth be told, we weren't all that attached to it.  The star didn't hold any sentimental value.  Growing up, I loved what my Mom placed at the top of our Christmas tree at home.  She had the most beautiful gold crown of thorns and since I've been married and have put up a tree in my home, I've wished I could find one just like hers.  This year, I decided to make one of my own.  Before I get started though, you may be wondering why I would place such a thing at the top of my tree?  As a Christian, I believe that God sent His son Jesus to earth for one reason.  Jesus lived a perfect life, suffered on the cross, and died so that we could live with Him in heaven someday!  For me, the crown of thorns is a symbol of why Jesus was born in that lowly manger on Christmas and what He suffered for me!  Placing it at the top of our tree reminds me and my family of what a gift our Savior is and points us to His death and resurrection as well as the eternal home we have in heaven.

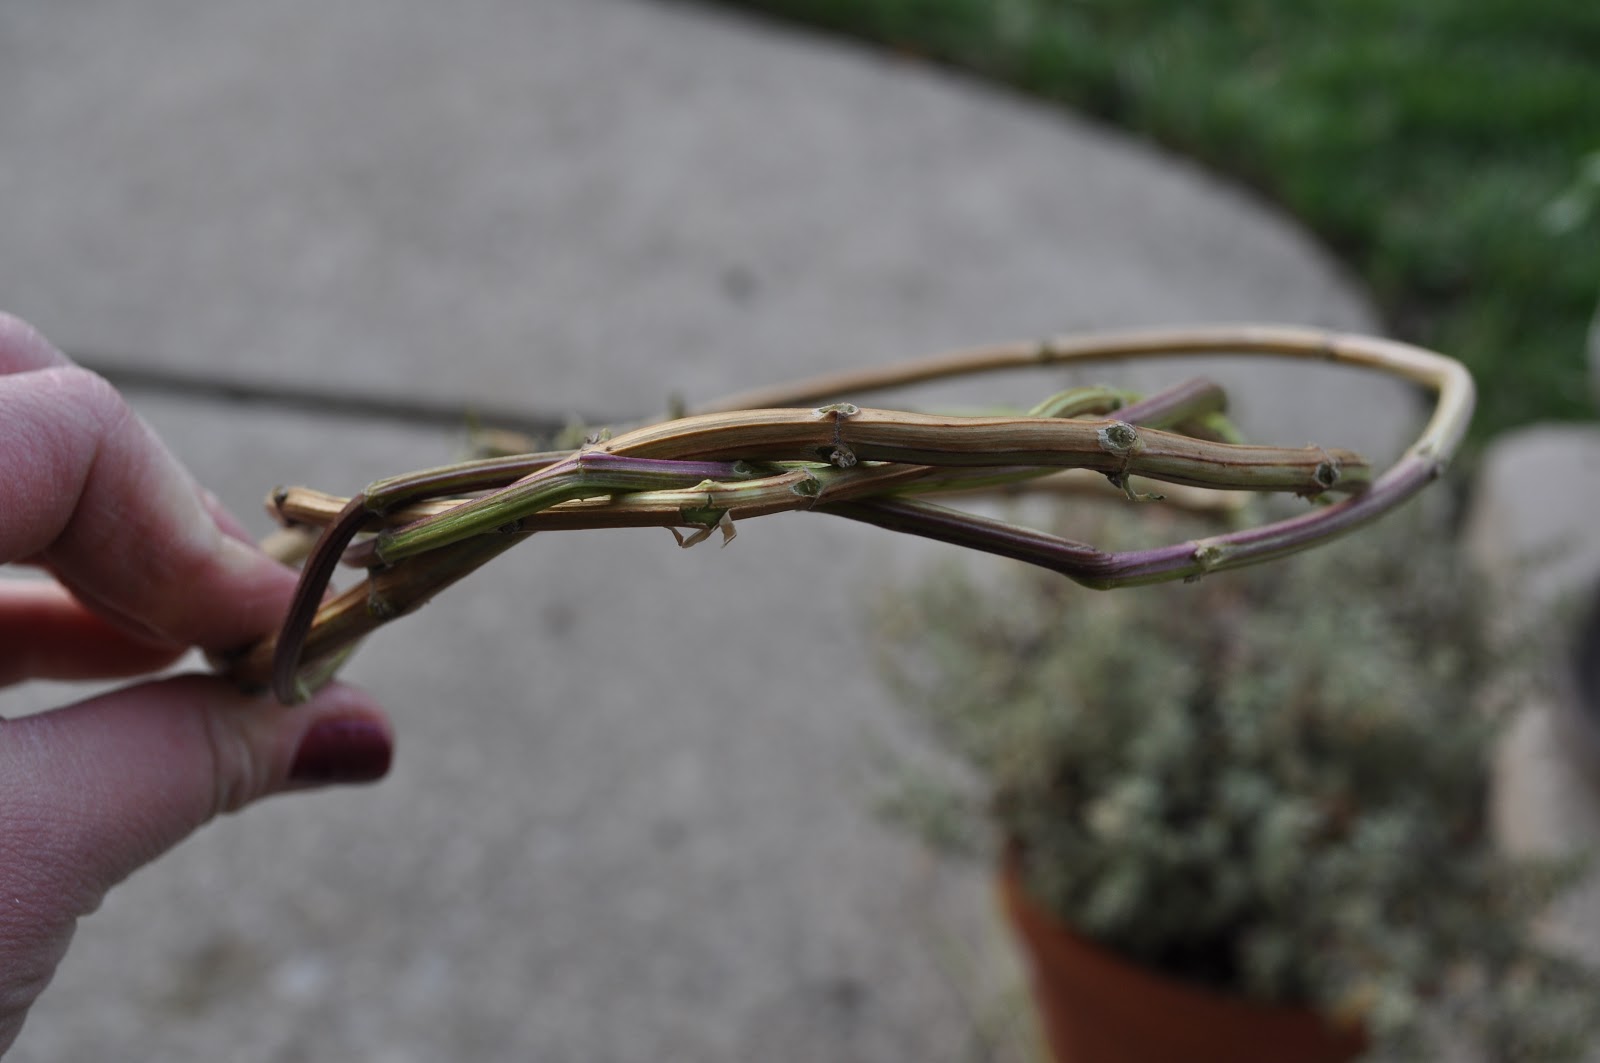
When I made this, I made sure to choose some sticks that were still a little green so that I could easily bend them into circles, kind of like a wreath.


I made a couple of circles and wound them around each other, fastening them together with some green floral wire.  I kept adding sticks until I got the look I was after.


After I primed it, I added the "thorns."  My thorns are actually small nails I hammered into the crown of thorns.


After I was done, I spray painted the entire crown of thorns silver.  After it was dry, Jason placed it at the top of our tree.


What special item does your family place at the top of your Christmas tree?

I'm linking up to:

My Uncommon Slice of Suburbia

Sunday, November 27, 2011

Glittered Pears

I saw this idea on Pinterest and loved it!  I loved it so much that I made it one of my first projects for Christmas.

Pinned Image
Via Pinterest
Image from We Heart It

I gathered all of my supplies.  To make these glittered pears you will need:
faux pears
glittering glue
glitter
string

I happened to buy all of my supplies at Michaels.  I love that store!


I tied some string around my pears so that I could hang them up while they dried.


I then set to work covering the green portion of the pears with the glittering glue.  I worked in small sections because the glue tended to dry very quickly.


I then sprinkled the glitter over the glue.  I love easy projects!


Here are my pears drying.


I left a little bit of the green showing since my colors for Christmas this year are green, silver, white, and brown.  I may throw a little red into the decor as well.  We'll see!


Since I had so much fun with the glitter, I did some pinecones as well!  I really love how they turned out!


If we ever get away from this gloomy weather, I'll take some pictures to show you how I incorporated these projects into my Christmas decor.  Here's hoping for some sunny weather tomorrow!

Monday, November 21, 2011

Christmas Herb Wreaths


If you are a regular reader of this blog you know that I love my herbs.  I have been covering them up every night in an attempt to keep them alive as long as I can.  The heartier herbs like the rosemary and lavender have been holding up well.  Come the first hard snow and I'll have to let them go.  Until then, we are enjoying every meal we can get with fresh herbs from our back yard!  I did want to think up a fun way to dry my rosemary and lavender, since they were so bountiful this year!  I decided to make some Christmas herb wreaths!

For this project you will need:

a woody, hearty herb such as rosemary, lavender, bay leaf, etc.
a wreath form
floral wire
wire cutters


 I made my wreath form from some flexible sticks I got from my lemon verbena plant.  They were still a little green which helped them bend a little easier.  I wired them together with the floral wire.  Don't worry if your form isn't perfect.  The herbs will cover it up!


I then took individual sprigs of rosemary and attached it to my wreath form with the wire, working my way around the form.


When I was done, I used some ribbon to make a bow and hang it on my door.  Easy and lovely!


The nice thing about an herb wreath is that it will dry out and the herbs can be used in your cooking!  Plus, it smells amazing!


I did the same thing with my lavender.  I made this wreath a little smaller.


Thanks for reading!

I'm linking up to:


O Give Thanks Banner

Happy Thanksgiving Week!  I completed this banner awhile ago now and am finally sharing it with you today.    I made it with burlap, card stock, jute, and hot glue.  All in all, it was a fun project that didn't require much time and energy!  In other words, it was my kind of project!


Things are pretty busy around my home this week, so I might be in and out...  Until then, have a wonderful week!

Wednesday, November 16, 2011

Christmas Inspiration

Here are a few of my favorite pins from Pinterest that have been inspiring my Christmas decorating as well as my Christmas spirit.  Yes, I have started and it isn't even Thanksgiving yet.  What can I say?  I love Christmas.  It is my favorite.  I hope you enjoy the following eye candy as much as I do!

Pinned Image


Pinned Image


Pinned Image


Pinned Image


Pinned Image


Pinned Image


Pinned Image


Pinned Image


Pinned Image


Pinned Image


Pinned Image


Are you drooling?  Just a little bit?  It's okay if you are.  I totally understand...

I love you, Thanksgiving...  but bring on Christmas!

Tuesday, November 15, 2011

A Boy and His Tricycle

Last night I ran across these pictures from a few short weeks ago.
My boys love this trike.  Unless it is raining, they are riding it.  Best forty dollars we ever spent!


Have a great night!

Monday, November 14, 2011

New Living Room Curtains

I finally have some light and airy curtains for our living room.  I think it is safe to say that I love them.


I had been looking for fabric to make my own but just could not find anything that I liked.  Looking online made me nervous because I wasn't sure what the colors would truly look like when I had the fabric in the room.  I just didn't want the hassle of returning something I didn't end up loving.


The curtains were a sale purchase from Target.  I bought three panels.  I plan to divide the panel for the smaller window so that there won't be so much fabric on either side.  I'm pretty pleased with the way they look in the room and cannot complain about the price, either!
 

Blog Template by YummyLolly.com - Header Frame by Pixels and Ice Cream
Sponsored by Free Web Space